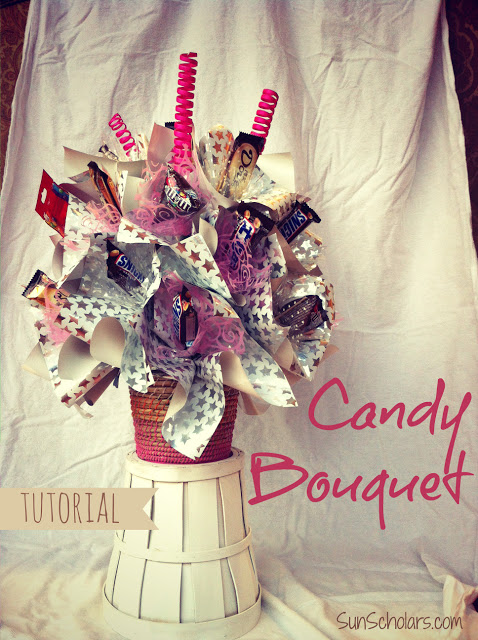
How to Make a Candy Bouquet – A Sweet Homemade Gift!
You have likely seen candy bouquets before. Just doing a quick search online for them, I found several different styles and looks. When I learned that one of my friends owned a shop where she sold custom candy bouquets, I couldn’t wait to have her share her secrets! I am sharing how to make your own candy bouquets with her tips. These make wonderful homemade gifts, for kids, co-workers, friends, teachers, anyone! They are sure to put a smile on the face of anyone with a sweet tooth!
Sadly, this original dandy bouquet tutorial is no longer on the Internet as sunscholar . com, the site where this how to article lived is no longer live. We have placed it here to keep it alive. If the owner would like us to remove this “sweet” post, please email us. We think this is a great companion post for our Candy Centerpieces post.
How to make a Candy Bouquet
Supplies Needed
- jar, mug, small basket or bucket, vase, or other small container to hold your bouquet
- floral craft foam
- floral tape
- wooden skewers (thicker and shorter are better)
- clear cellophane (printed designs on the cellophane give a nice result)
- colored and/or foil cellophane
- packaged candy of choice (25 or more pieces depending on how large and full your bouquet is)
- hot glue gun & glue sticks
- scissor
To make it more fun, a bunch of my friends got together for a candy bouquet-making party.
Look at our table full of supplies!!
Directions
1. Cut your cellophane (colored/foil and clear) into squares about 8-10″ in size. You will use one of each the colored and the clear for each candy skewer you make for your bouquet.
2. Place your Floral Foam into your base (jar, mug, basket, or other), and firmly press it down into place. If you are using a smaller container, you will want to use a knife to cut the foam into a shape that will snuggly fit. Make sure that your foam is nice and sturdy to give the support your bouquet will need when finished!
3. Create your base. Use a large piece of foil cellophane to cover the foam and finish off the base of your bouquet. You will want to make the foil as tight and secure as you can, gently pulling down the sides over the foam and using hot glue to glue around the top of your mug/jar/basket/etc. (The hot glue will not work well on the craft foam.) I found it easiest to do a small section at a time, placing the hot glue on the rim of my tin bucket as used in the image below, and securing the foil down tightly as I went along.
Once the foil is completely secured into place, trim off the edges. I chose to leave a bit of a ruffle at the bottom, as you see in the photo above.
4. Begin making your candy skewers! Using hot glue, glue the blunt end of the skewers inside the flap of your wrapped candies. If using candy in boxes, you can simply glue the skewer to the center, back. Suckers can also be used, by gluing the skewer to the stick, or using floral tape to wrap them together.
Once all of your candy is on a stick, you need to dress them up a bit! This is how you make your candy bouquet look nice and full, and colorful!
(1) Take a square of clear cellophane and pierce the middle with the pointy end of your candy skewer. Pull the cellophane up to a few inches below the candy, and wrap tightly around the stick.
(2) Use a small strip of floral tape to secure the clear cellophane to the skewer.
(3) Take a square of colored/foil cellophane and pierce the middle with the pointy end of your candy skewer. Pull the cellophane up about an inch below the clear cellophane, and wrap tightly around the stick.
(4) Use a small strip of floral tape to secure the colored/foil cellophane to the skewer.
5. Arrange your bouquet! Once you have your candy skewers complete, you can begin placing them into your base to create your bouquet. Andrea began with a top, center piece, and then added candy skewers with similar shapes symmetrically as she formed the shape she wanted.
Press the skewers deep, into the foam to make sure they are held securely in place. Continue to add skewers to fill in the holes, trying not to eliminate the need to move them once placed (you will more likely tear up the foil used to cover your foam if you do so).
And that is all there is to it!!
Happy Gift-Making!


