This was originally found on DarbySmart.com but has since been deleted. We were linking to this Christmas craft from this page, but when it was deleted we moved it here. If the original author would like it removed, please contact us.
Simple tutorial on how to transfer an image to wood for a unique Christmas ornament.
Trim & Cut
First thing is first, be sure you are using the laser photocopy of the mirrored image you would like to transfer. Then, trace and cut the image out so it is exactly the size of the puzzle.
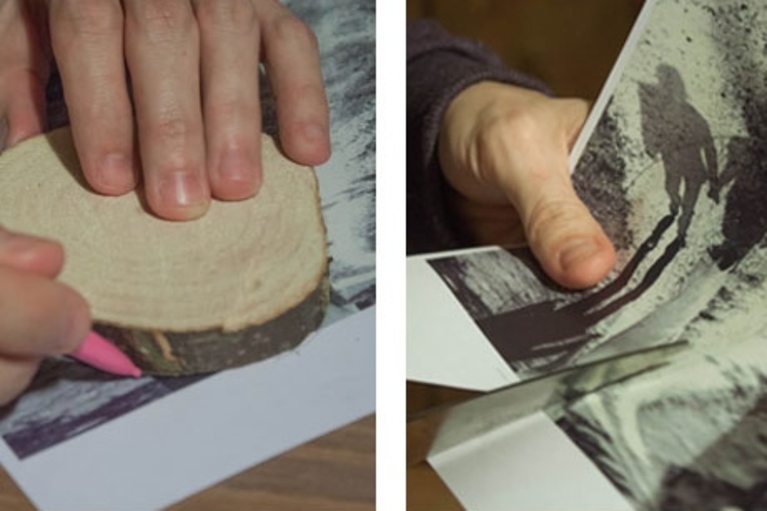
2. Coat It!
Next, place your image face up on one sheet of scratch paper. Now apply an even and generous coat of Photo Transfer Mod Podge to the face of your image. Carefully pull up the image and place it onto your wood slice face down.

3. Transfer It
Use a dry cloth towel or your fingers, lightly press out any bubbles or wrinkles. Start in the center and work your way to the edges. And then . . . turn on the clock. Good things come to those who wait, so allow your project to dry for at least 24 hours (we suggest 48 hours for the best results). If you’re in a humid environment, definitely wait the full 48 hours!

4. Reveal it
he wait is over and you get to reveal your image. Hop into the kitchen and grab a cloth towel and a cup of warm soapy water (just a drop of soap will do). Using the damp towel, rub off all visible paper in a soft circular motion (take your time, and be sure not to rub off your image). Remember don’t press too hard and only allow the towel to touch the image. You don’t want any finger prints! Wait about 10 minute for the picture to dry, then do a second pass to remove any excess fuzzy paper. This may take a few passes before all the paper fuzz is removed.
