This was a post we linked to (from this post Tie Dye DIY Ideas), but the site is no longer active so we have moved it to our our site so we can still provide the tutorial. It was originally located on shopplanetblue.blogspot.com. If the owner wishes this DIY post removed, please notify us. Here is the original Indigo dye post in its full glory (we did fix a few typos).
We’ve been lusting after the indigo fabrics from Lookout & Wonderland at The General Store since they opened. So when we learned the artist behind these curtains, blankets, scarves and tea towels taught an introductory class to indigo dying – it was a no brainer to sign up.
While we HIGHLY recommend taking Lookout & Wonderland’s classes (check her blog for updated schedules), if you’re itching to immediately turn some fabric a beautiful indigo hue, we’ve provided a little tutorial below.

- Indigo Tie Dye Kit (or you can order an indigo starter kit from Lookout & Wonderland)
- Embroidery Needles
- Embroidery Thread
- Scissors
- Elbow Length Rubber Gloves
- 5 Gallon Stainless Steel Pot filled with 75-120 degree water
- Bucket of Water
- Vinegar
- Drying Rack
Instructions
1. Prepare the vat by emptying the indigo reduction, thiodox and soda ash into the 5 gallon stainless steel pot filled with 75-120 degree water.
2. Stitch your garment. There are several different stitches you can do and they all offer different results. One of the easiest ones is to just stitch in a straight line. Another one is to fold over the fabric like a pleat then sew straight. These create different resists and will create a white pattern. After you finish all your stitches you pull the string tight and scrunch the fabric.
3. Remove flower* from the vat and save in a smaller bowl. *flower is the thick layer that forms on the top of the vat.
4. Soak your garment in water and ring out any excess moisture
5. Slowly sink the garment into the vat of indigo and once fully submerged massage the indigo into the stitched sections and hold under for one minute.
6. Slowly remove garment from the vat, once completely removed quickly submerge in the other bucket of water and rinse thoroughly. As you remove the garment from the water it will turn from green to blue as it oxidizes. Lay flat to dry on drying rack.
7. Repeat steps 4-6 at least twice or until the maximum dark blue is achieved.
8. After garment is completely dry rinse in 1/4 cup vinegar and 1 gallon of water then hand or machine wash depending on fabric.


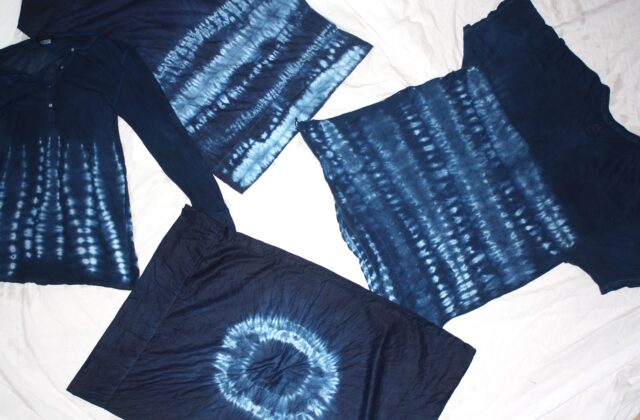
Finished Product

Inspiration


Image Credit: Lookout & Wonderland
I’m dying to create a duvet cover next – what are you going to turn blue?
...