Welcome, DIYers!
Hello, DIYers!
This is another discarded post from a site that is no longer around. Because we loved it so much, we saved this from the Internet grave yard for your enjoyment! This V-Stitch Cowl project was originally found on the now MaybeMatilda.com.
Quick Striped V-Stitch Cowl
This will come as a big shock to exactly zero people, but I have a rather large yarn stash. And while I love my sweet precious stash, I think it’s time I start finding ways to use it up instead of always going shopping for new yarn every time I have a new project to crochet. I think this could make a good 2014 goal for me, actually—using up my yarn/fabric stash instead of letting it continue along its current course of slowly but steadily swallowing my house whole). So when I got the urge to make myself a new winter cowl recently, my goal was to come up with a pattern that would utilize what I already have instead of giving me yet another excuse to go yarn shopping. And if you need to go yarn shopping to make this? I 100% endorse that. I love yarn shopping. But it happens to be a great way to clear out some scrap yarn, if you’ve got some to spare.

This cowl is really quick and simple to make, and has tons of potential for all sorts of variety–just find some colors (any colors!) you like together, and do as many or as few stripes as you want. And you can easily make this cowl as long or short and as wide or thin as you’d like . . . totally easy to adapt to fit whatever you want it look like.
If you’re a pattern-reading pro, you’ll find the short version of the pattern just below. But if you have trouble deciphering patterns with all their abbreviations, or could use a few pictures along the way to help you figure things out, scroll down a bit more for the step-by-step, fully written-out, plain English version of the pattern with photos for each step.
As for supplies, you’ll just need some odds and ends of worsted weight yarn (as many or as few colors as you’d like), and an appropriate size hook for the yarns you’re using (I used an I hook, but feel free to go up or down a size or two if that’s what you already own) as well as a blunt large-eye needle for weaving in the yarn tails. Enjoy!
Quick Striped V-Stitch Cowl (short version)
(V-stitch = dc, ch 1, dc, all in same st)
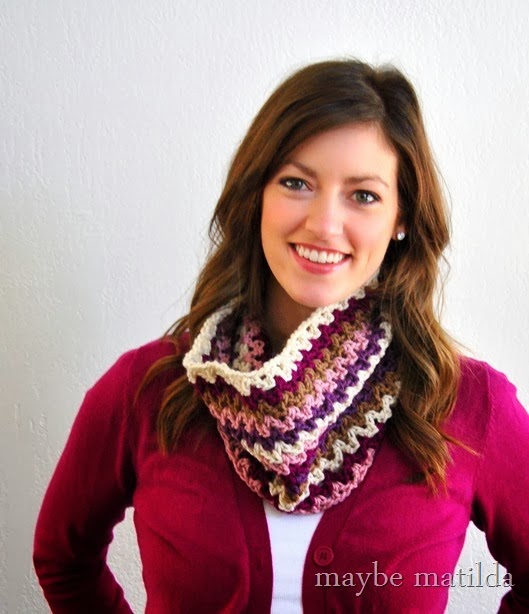
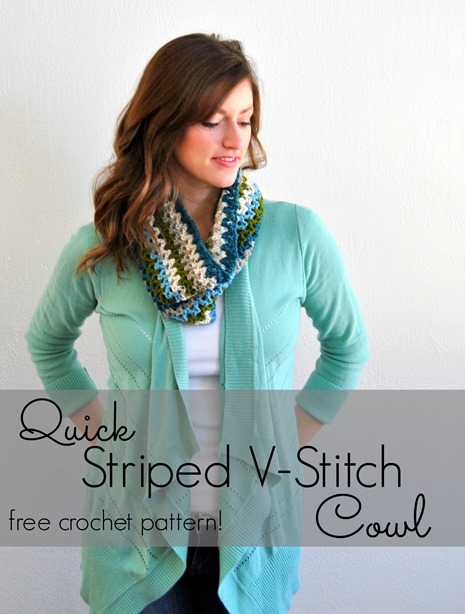
Ch multiples of 3 to desired cowl length (see photos above for examples; purple cowl used a starting chain of 90, blue used a starting chain of 96); sl st to first ch to join (make sure ch is not twisted!).
Row 1: Ch 3, dc in same st as join (this makes first V-stitch), *sk 2 st, (dc, ch1, dc) in next st* Repeat from * to * around. Join with sl st in 2nd ch of starting ch. Fasten off.
2: Join new color in ch1 space of first V-stitch of previous row, ch 3 and dc in same sp; (dc, ch 1, dc) in ch 1 sp of each V-stitch around. Join with sl st in 2nd ch of starting ch. Fasten off.
Repeat row 2 to reach desired cowl width. Weave in ends.
Step-by-Step Photo Tutorial
Start out by making a chain in multiples of 3. (The chain length determines how long your finished cowl will hang, so check the length as you go by wrapping it around your neck, cowl-style, to see your progress. As long as you end up with a number that is a multiple of 3, and it is a length you are happy with, you’re good to go! For the purple-ish cowl in the pictures, I had a starting chain of 90; for the blue cowl, I had a starting chain of 96. Just make sure you end up with a multiple of 3! You can make it super long to wrap around your neck more than once for ultimate coziness, or keep it shorter for a more snug-fitting cowl, like I did.) If you need a refresher on how to make a starting chain, visit THIS post.
When your starting chain is the length you want your cowl to be, you need to join the two ends to make a loop. Make sure your chain is lying FLAT—there can’t be any twists or turns in it. Join the two ends with a slip stitch by inserting your hook under one or both loops of the FIRST chain (the one directly next to the knot at the start, shown below):
Then grab a loop of yarn and pull it all the way through to complete your slip stitch.
Now you’re going to begin making your first V-stitch by making 3 more chains
Then work a double crochet into the same stitch that your chain of 3 is coming up out of—this is still the chain that you worked into to join your starting chain into a loop. (If you need a refresher on how to make a double crochet, visit THIS post.)
This counts as your first V-stitch! It’s slightly different from a typical V-stitch since we had to use a chain to get started, but you won’t be able to see a difference once your cowl is completed. All the rest of your V-stitches will be made as follows: skip the next 2 stitches in your chain, and work one double crochet, then one chain, then another double crochet all into the third stitch. Got it? That’s how you make a V-stitch. Just skip 2 stitches, and work a double crochet, chain one, double crochet all into the third stitch, and continue repeating that all the way around the loop. It should look like this:
When you’ve worked all the way around, you should have 2 more empty chains before your first V-stitch (which began with the chain of 3 at the start of this row):
To close up this row, you’ll join the first and last V-stitches of the row by working a slip stitch into the 2nd chain of that beginning chain 3 (which is the right ‘leg’ of your first V-stitch).
Then fasten off this color by making one more chain, snipping the yarn a few inches out to leave a tail you can sew in later, and pulling the tail through. You’re done with your first row, and first color stripe.
Starting with this second row, and throughout the rest of the cowl, we’ll be working into the chain 1 spaces of each V-stitch from the row before. So instead of actually working under/through any loops, you’ll just put your hook right into the chain 1 space at the center of each V, as shown below. Join in your new color, and start your row just like you started the last one—chain 3, then work a double crochet, all into the chain 1 space of a V-stitch.
Then continue making V-stitches on top of each V-stitch from the row before by making one double crochet, one chain, and another double crochet, all into the chain 1 space of the V-stitch below. So your V-stitches should be stacked on top of each other, as shown in the picture below.
Work your way around, and finish the row the same as you did on Row 1—work a slip stitch into the 2nd chain of the first chain of 3 (the right ‘leg’ of the first V-stitch in the row), and fasten off this color.
Every row from here on out is just a repeat of Row 2. Change colors on each row for a cute striped look! I did 13 rows total for my cowls, but feel free to do as you’d like. Try it on as you go to see if you like the look of a wider or thinner cowl. When you’re happy with it, just finish your final row and fasten it off. Then use a large-eye blunt needle to sew all the ends in.


